
Asakuki Diffuser Instructions: A Comprehensive Guide
Discover how to maximize your aromatherapy experience with your Asakuki diffuser! This guide details setup‚ operation‚ maintenance‚ and troubleshooting for optimal performance and enjoyment.
Understanding Your Asakuki Diffuser
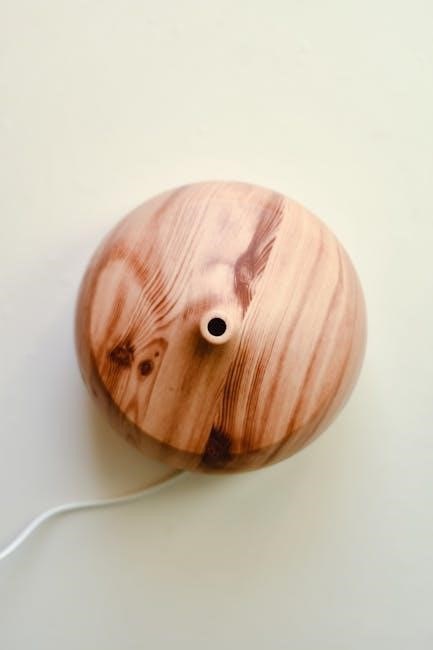
Your Asakuki diffuser is a sophisticated aromatherapy device designed to enhance your well-being by dispersing essential oils into the air. Utilizing ultrasonic technology‚ it breaks down water and essential oils into micro-fine particles‚ creating a fragrant mist that humidifies and revitalizes your living space.
This isn’t merely an air freshener; it’s a tool for creating a specific atmosphere – promoting relaxation‚ boosting energy‚ or improving sleep quality. The 5-in-1 functionality‚ as highlighted‚ suggests versatility beyond simple diffusion‚ potentially including features like ambient lighting and sound options. Understanding these capabilities is key to unlocking the full potential of your device.

The diffuser’s effectiveness relies on a balance between humidity and fragrance‚ bridging the gap between indoor environments and the natural world. ASAKUKI prioritizes quality and a refined experience‚ aiming to create a space that feels both natural and elegant. Familiarizing yourself with its components and functions will ensure a seamless and enjoyable aromatherapy journey.
Unboxing and Component Overview
Carefully unpack your Asakuki diffuser and verify all components are present. You should find the diffuser base‚ which houses the ultrasonic mechanism and controls. A removable inner cover protects the water tank. The power adapter is essential for operation‚ and a measuring cup is included for precise water and oil dosage.
Depending on the model‚ you may also receive additional accessories. Some diffusers include a cleaning brush for maintenance‚ and others feature remote controls for convenient operation. Refer to the included documentation to confirm the contents of your specific package.
Inspect each component for any signs of damage. If anything is missing or damaged‚ contact customer support immediately. Familiarize yourself with the location of the water level indicator‚ mist output nozzle‚ and LED light panel. Understanding these parts will be crucial during setup and daily use‚ ensuring optimal performance and longevity of your aromatherapy device.

Setting Up Your Diffuser: A Step-by-Step Guide
Begin by placing your Asakuki diffuser on a stable‚ flat surface‚ away from direct sunlight and heat sources. Gently remove the inner cover of the diffuser base. Using the provided measuring cup‚ carefully pour clean‚ room-temperature tap water into the water tank‚ ensuring you do not exceed the maximum water level indicated.
Add your preferred essential oils. Typically‚ 3-5 drops per 100ml of water is recommended‚ but adjust to your preference. Replace the inner cover securely. Connect the power adapter to the diffuser and plug it into a standard electrical outlet. Ensure the connection is firm and stable.
Before powering on‚ double-check that all components are correctly assembled. A properly set up diffuser will ensure optimal mist output and prevent potential issues. Now you are ready to enjoy the benefits of aromatherapy!
Water Level and Oil Dosage
Maintaining the correct water level is crucial for optimal diffuser performance. Never operate the diffuser without water‚ as this can damage the ultrasonic plate. Always fill the water tank to the maximum fill line‚ but avoid overfilling‚ which can lead to leaks or reduced mist output. Use clean‚ room-temperature tap water for best results.
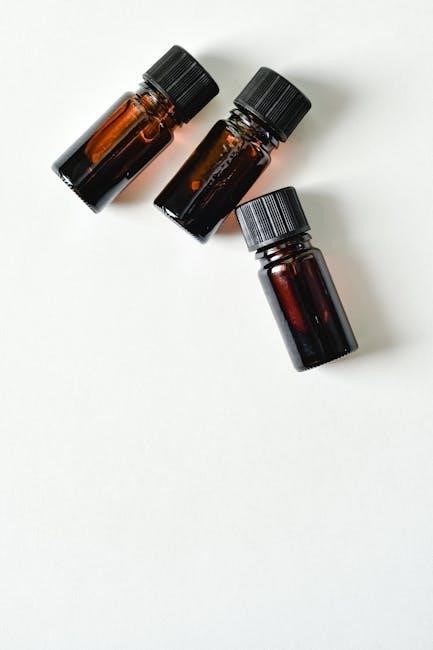
Essential oil dosage significantly impacts the aroma’s intensity. A general guideline is 3-5 drops of essential oil per 100ml of water. Start with the lower end of the range and add more drops gradually to achieve your desired scent strength.

Be mindful of oil quality; pure essential oils provide the best therapeutic benefits. Avoid using thick or viscous oils‚ as they may clog the diffuser. Experiment with different oil combinations to create personalized aromatherapy blends‚ always prioritizing safety and dilution.
Powering On and Mist Control
To power on your Asakuki diffuser‚ connect the provided power adapter to a suitable outlet and the diffuser’s DC input. The power button typically initiates operation‚ often accompanied by an indicator light. Most models feature intuitive mist control options‚ allowing you to customize your aromatherapy experience.
Typically‚ a single press activates continuous mist mode‚ releasing a steady stream of fragrant vapor. Subsequent presses often cycle through intermittent mist settings‚ offering periodic bursts of aroma. Explore the various mist intensity levels‚ if available‚ to adjust the fragrance strength to your preference.
Ensure the diffuser is placed on a stable‚ level surface before operation. Avoid obstructing the mist outlet‚ as this can hinder performance. Familiarize yourself with the specific button functions of your model for seamless mist control and optimal aromatherapy benefits.
Mist Modes Explained: Continuous‚ Intermittent‚ and Timer
Asakuki diffusers commonly offer three primary mist modes: Continuous‚ Intermittent‚ and Timer. Continuous mode provides a steady‚ consistent release of aromatherapy mist‚ ideal for prolonged fragrance diffusion throughout a space. This mode is perfect for larger rooms or when a constant aroma is desired.
Intermittent mode cycles between periods of mist emission and pauses‚ conserving essential oil usage while still providing a noticeable fragrance. This is a great option for bedrooms or smaller areas where a subtle aroma is preferred. The interval duration varies by model.
The Timer function allows you to pre-set the diffuser to operate for a specific duration‚ such as 1‚ 3‚ or 6 hours‚ before automatically shutting off. This feature enhances safety and prevents over-diffusion. Experiment with each mode to discover the optimal setting for your needs and preferences‚ maximizing both fragrance and oil efficiency.
LED Light Functionality and Color Options
Asakuki diffusers often incorporate integrated LED lighting to enhance the ambiance of your space. Typically‚ these diffusers offer a spectrum of seven different LED colors – red‚ orange‚ yellow‚ green‚ blue‚ indigo‚ and violet – allowing you to customize the mood to suit your preferences.
You can usually cycle through the colors by pressing a dedicated button on the diffuser. Many models also feature a “color-changing” mode‚ which slowly transitions between each hue‚ creating a soothing and visually appealing effect. The light can often be set to remain on a single color‚ or turned off entirely if desired.
The LED light functionality is independent of the misting function‚ meaning you can enjoy the aromatherapy benefits without the light‚ or vice versa. Utilizing the light features can contribute to a relaxing and therapeutic atmosphere‚ complementing the essential oil diffusion process.
Adjusting Light Brightness and Modes
Beyond simply selecting a color‚ many Asakuki diffusers allow for adjustment of the LED light’s brightness. This is typically controlled via a dedicated button‚ often requiring multiple presses to cycle through different intensity levels – low‚ medium‚ and high. Some advanced models may even offer a continuous dimming function for precise control.
Regarding modes‚ beyond the standard solid color and color-changing options‚ some diffusers feature pulse or breathing modes. These create a subtle‚ rhythmic brightening and dimming effect‚ mimicking natural breathing patterns and enhancing relaxation. The specific modes available will vary depending on the diffuser model.
Experiment with different brightness levels and modes to find the setting that best suits your environment and desired mood. A dimmer setting is ideal for bedtime‚ while a brighter‚ dynamic mode can be invigorating during the day. Refer to your diffuser’s manual for specific instructions on adjusting these features.
Auto Shut-Off Feature: Safety First
A crucial safety feature of most Asakuki diffusers is the automatic shut-off function. This intelligently monitors the water level within the reservoir. When the water level drops too low‚ the diffuser will automatically power down‚ preventing damage to the unit and eliminating any potential fire hazard.
This feature is particularly important for overnight use or when you may forget to manually turn off the diffuser. It provides peace of mind‚ knowing the device won’t continue running dry. However‚ it’s vital not to rely solely on this feature; regularly check the water level and refill as needed.
Some models may also incorporate overheat protection‚ adding an extra layer of safety. Always ensure the diffuser is placed on a stable‚ level surface and away from flammable materials. Understanding and utilizing the auto shut-off feature is paramount for safe and responsible operation.
Cleaning and Maintenance
Regular cleaning is essential for maintaining the performance and longevity of your Asakuki diffuser. Mineral buildup from water and residue from essential oils can impede mist output and potentially damage the ultrasonic plate. It’s recommended to clean the diffuser after every 3-5 uses‚ or more frequently with heavily used or oily essential oils.
Begin by unplugging the diffuser and emptying any remaining water. Gently wipe the inside of the water tank with a soft cloth. For stubborn residue‚ use a diluted solution of white vinegar and water (1:1 ratio). Avoid harsh chemicals or abrasive cleaners‚ as these can damage the plastic.
Pay close attention to the ultrasonic plate; clean it carefully with a cotton swab dipped in rubbing alcohol. Ensure it’s completely dry before reassembling. Proper cleaning ensures optimal diffusion and prevents unpleasant odors.
Deep Cleaning Procedures
For a thorough refresh‚ perform a deep cleaning of your Asakuki diffuser monthly‚ or if you notice significant mineral buildup. Begin by emptying and wiping the water tank as described in the general cleaning instructions. Then‚ fill the tank with clean water and add approximately one tablespoon of white vinegar.
Run the diffuser for 5-10 minutes to allow the vinegar solution to circulate and loosen deposits. Afterwards‚ unplug the diffuser and carefully empty the vinegar water. Use a soft brush or cloth to scrub any remaining residue from the tank and ultrasonic plate. Rinse thoroughly with clean water.
Finally‚ allow all components to air dry completely before reassembling and using. This deep cleaning process helps eliminate stubborn buildup‚ ensuring optimal performance and extending the lifespan of your diffuser. Avoid using soap‚ as it can leave a residue.
Troubleshooting Common Issues
Encountering problems with your Asakuki diffuser? Here’s a quick guide to resolving common issues. If the diffuser isn’t powering on‚ check the power adapter and ensure it’s securely connected. Verify the outlet is functioning correctly. For no mist output‚ confirm sufficient water levels and that the ultrasonic plate is clean – mineral buildup is a frequent culprit.
Leaks can occur if the tank is overfilled or not seated correctly. Ensure proper alignment and avoid exceeding the maximum water line. Unusual noises often indicate low water levels or a foreign object within the tank. Always unplug the diffuser before inspecting.
If the LED light isn’t working‚ try resetting the diffuser by unplugging it for a few minutes. If problems persist‚ consult the warranty information or contact customer support for assistance. Regular maintenance significantly reduces the likelihood of these issues.
Addressing No Mist Output

If your Asakuki diffuser isn’t producing mist‚ several factors could be at play. First‚ verify the water level meets the minimum requirement indicated on the tank; insufficient water prevents operation. Next‚ meticulously inspect the ultrasonic disc – this small component is prone to mineral buildup from tap water.
Gently clean the disc with a soft cloth and diluted white vinegar. Ensure the diffuser is unplugged during cleaning! Also‚ confirm the diffuser is properly assembled; the tank must be securely seated on the base for correct functionality. Check the mist output settings; it might be set to intermittent mode or a timer.

Finally‚ ensure you’re using an appropriate essential oil – overly viscous oils can clog the ultrasonic plate. If issues persist after these checks‚ a reset (unplugging for several minutes) might resolve the problem.
Dealing with Leaks and Water Damage
Leaks from your Asakuki diffuser can occur due to several reasons. Always ensure the water tank is correctly seated and sealed onto the base; improper alignment is a common cause. Avoid overfilling the tank beyond the maximum water level line‚ as this can lead to spillage during operation.
Inspect the sealing ring within the tank for damage or debris. A compromised seal won’t prevent water from escaping. If you notice cracks in the tank itself‚ discontinue use immediately – a damaged tank poses a safety hazard. Should leakage occur‚ immediately unplug the diffuser to prevent electrical damage.

Carefully wipe up any spilled water to avoid damage to surfaces. Never submerge the base unit in water. If water enters the electrical components‚ do not attempt to use the diffuser and contact customer support for assistance.
Extending the Lifespan of Your Diffuser
To ensure your Asakuki diffuser provides years of reliable aromatherapy‚ consistent maintenance is key. Regularly clean the water tank after each use‚ preventing mineral buildup that can degrade performance and shorten the diffuser’s life. Use a soft cloth and mild detergent; avoid abrasive cleaners.
When not in use for extended periods‚ completely empty and dry the water tank. This prevents mold and bacterial growth. Store the diffuser in a cool‚ dry place‚ away from direct sunlight and extreme temperatures. Avoid placing heavy objects on top of the diffuser‚ which could cause damage.
Use only 100% pure essential oils‚ as synthetic fragrances can clog the ultrasonic plate. Periodically inspect the power cord for any signs of wear or damage‚ and replace it if necessary; Following these simple steps will maximize your diffuser’s longevity.
Essential Oil Recommendations for Asakuki Diffusers
Asakuki diffusers work beautifully with a wide range of 100% pure essential oils. For relaxation and sleep‚ Lavender‚ Chamomile‚ and Bergamot are excellent choices. To invigorate and boost energy‚ consider Peppermint‚ Eucalyptus‚ and Lemon. Diffusing Rosemary can enhance focus and concentration‚ ideal for work or study.
When experimenting‚ start with a few drops and adjust to your preference. Citrus oils like Orange and Grapefruit create a cheerful atmosphere‚ while Tea Tree oil offers purifying benefits. Blends can also be incredibly effective – try Lavender and Cedarwood for calming‚ or Lemon and Rosemary for an uplifting combination.
Always ensure the oils are suitable for diffusion and safe for any pets or individuals with sensitivities. High-quality oils deliver the best therapeutic benefits and prevent residue buildup within your diffuser‚ prolonging its lifespan and maximizing your aromatherapy experience.
Warranty Information and Customer Support
Asakuki stands behind the quality of its diffusers with a comprehensive warranty. Most models are covered by a one-year limited warranty against manufacturing defects. This warranty covers issues arising from normal use‚ excluding damage caused by misuse‚ accidents‚ or unauthorized repairs.
To initiate a warranty claim‚ please retain your proof of purchase and contact Asakuki’s customer support team. They will guide you through the process‚ which may involve providing photos or returning the unit for inspection.

For assistance with setup‚ troubleshooting‚ or general inquiries‚ Asakuki offers multiple support channels. Visit their official website for FAQs‚ user manuals‚ and a contact form. You can also reach them via email or phone during business hours. Dedicated support ensures a seamless experience and addresses any concerns promptly.