
Welcome to your Night Owl 8-Channel DVR Manual. This guide covers installation, features, and maintenance, ensuring optimal security system performance. Designed for user-friendly setup and operation of your 8-channel HD recording system, it helps you.
Manual Purpose and Scope
The purpose of this Night Owl 8-channel DVR Manual is to serve as a comprehensive, user-friendly guide for the optimal setup, operation, and ongoing maintenance of your security system. It empowers users, from novices to experienced technicians, with essential knowledge to seamlessly integrate and manage their 8-channel HD recording system. This manual ensures you can fully leverage all features for robust surveillance and optimal security system performance.
The scope of this document is specifically tailored for the Night Owl 8-channel digital video recorder, offering detailed instructions throughout its lifecycle. It covers initial hardware installation, connecting cameras, and powering on the unit. It also details adding your DVR to the Night Owl Protect account for effective remote mobile monitoring. Furthermore, the manual outlines various recording options, such as advanced motion detection settings, and elucidates night vision technology utilizing infrared LEDs. Essential guidance on checking current firmware versions, performing updates, and troubleshooting common issues, including identifying the hard reset button location, is thoroughly included. This comprehensive guide is accessible for online viewing and PDF download, offering in-depth support for maximizing your Night Owl DVR’s performance.
System Overview and Key Features
The Night Owl 8-Channel DVR is a robust digital video recorder designed for comprehensive home or business security. This advanced 8-channel HD recording system is engineered for seamless operation, allowing users to connect up to eight cameras for extensive surveillance coverage. A key component, this DVR frequently includes a substantial 1TB HDD for ample video storage, supporting continuous recording and playback of critical footage. Its compatibility with 1080p cameras ensures high-definition video capture, providing clear and detailed imagery for enhanced monitoring.
Among its vital features is the capability for remote monitoring with mobile devices, facilitated through the Night Owl Protect application. This allows users to access live feeds and recordings from anywhere, ensuring constant vigilance. The system boasts sophisticated recording options, including highly customizable motion detection settings that trigger recording upon sensing activity, conserving storage and focusing on relevant events. Furthermore, the DVR supports advanced camera functionalities like Night Vision with Infrared LEDs, which delivers clear visibility in low-light or complete darkness, providing round-the-clock protection. The inclusion of loop-cycle recording ensures the DVR continues to record by overwriting the oldest footage when storage is full, maintaining continuous surveillance without manual intervention. This system overview highlights its core functionalities for reliable security, making it ideal for various environments.

Accessing the Night Owl DVR Manual
Accessing your Night Owl 8-Channel DVR manual is essential for proper setup and operation. Comprehensive user guides, available online or as a PDF download, provide instructions for managing your digital video recorder system.
Online Manual Viewing
For immediate access and convenient reference, you can easily view your Night Owl 8-Channel DVR manual online. Many Night Owl user manuals are readily available on the manufacturer’s official support website or through dedicated manual aggregators. This method allows you to quickly navigate through the comprehensive guide without needing to download any files. You can find detailed instructions for installation, system overview, key features, and operational guidance directly in your web browser. Online viewing often provides an interactive experience, sometimes with searchable content, making it simple to locate specific information about connecting cameras, powering on the DVR, or understanding recording options. To ensure the best viewing experience, it is often recommended to enable JavaScript and cookies in your browser settings, ensuring all interactive elements load correctly. Whether troubleshooting an issue, setting up new components, or familiarizing yourself with your security system’s capabilities, the online manual offers a flexible and always-accessible resource. You can typically find a “View Online” option next to the manual’s listing, providing instant access to pages of information, such as the 124 pages mentioned for some models. This ensures you have the most up-to-date information at your fingertips, anytime, anywhere, provided an internet connection.
PDF Manual Download
For offline access and convenient reference, downloading the Night Owl 8-Channel DVR manual in PDF format is highly recommended. This allows you to view the complete guide on any device without an internet connection, ensuring you always have the necessary information for setup, operation, and troubleshooting. You can often find the PDF download option directly on the Night Owl support website or through various reputable manual download portals. These downloadable guides, such as the 3.62 MB PDF for a 12-CH system, typically cover all aspects of your 8-channel digital video recorder, from initial installation to advanced features. Many users prefer a PDF manual for its portability and ease of printing specific sections if needed. The comprehensive collection of Night Owl DVR PDF manuals often includes user manuals, operating guides, and service manuals, catering to diverse needs. Getting your free PDF guide for setup, troubleshooting, and optimal use is a straightforward process, providing invaluable assistance. This comprehensive digital document ensures you have detailed instructions for connecting cameras, understanding recording options, and maintaining your system effectively, making it an indispensable resource for both new and experienced users alike. Downloadable manuals provide a permanent record, unlike transient online pages, ensuring long-term reference availability.
Locating Manuals for Other Night Owl Models
When you need to locate manuals for Night Owl DVR models other than the 8-channel system, several resources are available. Night Owl produces various digital video recorders, including 4-channel, 12-channel, and 16-channel versions. To find the correct user guide, it’s best to start with the official Night Owl support website. Their comprehensive database typically allows users to search by model number or product series, such as the STA-series, which encompasses 4, 8, and 16-channel user manuals; Additionally, many third-party manual repositories, like those hosting 52 Night Owl DVR PDF manuals, offer a wide selection of operating guides and service manuals for different models. For instance, you might find a 12-CH System information PDF manual available for download, often detailing setup and features specific to that channel count. Always ensure you are downloading from a trusted source to guarantee the accuracy and safety of the document. These resources are crucial for understanding the unique functionalities, installation procedures, and troubleshooting tips relevant to your specific Night Owl DVR, whether it’s a 16-channel digital video recorder or a simpler 4-channel variant. Accessing the right manual ensures optimal system performance and helps resolve model-specific queries efficiently.

Initial Setup and System Installation
This section provides a comprehensive guide to setting up your Night Owl 8-channel DVR. It covers critical steps like connecting cameras, powering the system, and integrating with Night Owl Protect for immediate functionality.
Connecting Cameras to DVR
Connecting your security cameras to the Night Owl 8-channel DVR is the foundational step in setting up your surveillance system. Before any permanent mounting, it is crucial to first connect and thoroughly test each camera with the DVR unit. This preliminary testing ensures that all components are functioning correctly and helps identify any potential issues early in the installation process. Begin by carefully running the necessary cables from each camera to the corresponding input ports on the back of your DVR. It is highly recommended to connect these cables in a sequential order, matching camera locations to specific DVR channels (e.g., Camera 1 to DVR input 1, Camera 2 to DVR input 2, and so forth). This systematic approach significantly simplifies future identification and troubleshooting of individual camera feeds. Ensure that all connections are secure and properly seated to prevent signal loss or interference. The cables typically carry both video and power signals, so verify that both aspects are correctly linked. Once all cameras are physically connected, you will then proceed to power on your DVR system to confirm that each camera feed appears clearly on your monitor. This initial check-up is vital for a robust and reliable security setup, preparing you for the next stages of system configuration and operation. Confirming signal integrity now saves considerable effort later. A careful approach here pays off.
Powering On the DVR System
Once all your cameras are securely connected to the DVR’s input ports, the next critical step is to power on your Night Owl 8-channel DVR system. Before plugging in the power adapter, double-check all cable connections, including those for your cameras, the monitor, and any network cables, ensuring they are firm and correctly seated. Locate the provided power adapter specifically designed for your DVR unit. Connect the adapter’s barrel plug securely into the designated power input port on the back of the DVR. Following this, carefully plug the other end of the power adapter into a reliable electrical outlet. It is advisable to use a surge protector to safeguard your valuable equipment from potential power fluctuations. Upon receiving power, your DVR system will begin its boot-up sequence. You should observe indicator lights illuminating on the DVR unit, and a boot screen will typically appear on the connected monitor. This initial startup process may take a few moments as the system initializes its operating software and hardware. During this phase, the DVR prepares itself for operation, displaying the Night Owl logo or a similar startup sequence. Once fully powered on, the system will usually present you with a login screen or directly show the live camera feeds, confirming successful initialization. Ensuring a stable power source is paramount for the longevity and consistent performance of your security system.
Adding Your DVR to Night Owl Protect
To fully leverage the remote monitoring capabilities of your Night Owl 8-channel DVR, it is essential to add your device to the Night Owl Protect application. This integration allows you to monitor your home or business from virtually anywhere, aligning perfectly with a mobile lifestyle. First, ensure your wired DVR has been successfully powered on and connected to your network. If you haven’t already, download the Night Owl Protect app from your device’s app store. New users will need to create an account within the application, following the on-screen prompts for registration. Existing users can simply log in with their credentials. Once logged in, navigate to the “Add Device” or similar section within the app. You will typically be prompted to scan a QR code located on your DVR unit, or manually enter the device’s serial number. The app will then guide you through the remaining steps to link your DVR. Confirming the addition allows you to access live views, playback recordings, and configure settings directly from your smartphone or tablet. Referencing page 33 of the user manual provides detailed instructions on account creation and device addition, ensuring a seamless setup process for remote accessibility and enhanced security management.
General Hardware Installation
The general hardware installation of your Night Owl 8-channel DVR system is a foundational process for establishing effective surveillance. The initial step involves connecting and testing cameras with the DVR before mounting them permanently. This preliminary verification ensures each camera functions correctly and provides clear video signals. Connect the cables from your cameras to the DVR’s sequential inputs, matching channels for organized management. After securing all camera connections, power on the DVR system using its dedicated adapter. Ensure the DVR unit is placed in a well-ventilated area, away from direct sunlight or extreme temperatures, to prevent overheating and extend its operational lifespan; Next, connect a monitor to the DVR using an HDMI or VGA cable to access the system’s graphical user interface for local viewing and configuration. Finally, link the DVR to your network by connecting an Ethernet cable from the DVR to your internet router. This network connection is indispensable for enabling remote viewing and mobile monitoring capabilities through the Night Owl Protect app. Double-check all physical connections meticulously for firmness and correct seating, ensuring uninterrupted data flow and system stability.

Operating Your Night Owl 8-Channel DVR
Operating your Night Owl 8-Channel DVR allows comprehensive control. You can remotely monitor your home or business with mobile devices, utilize advanced recording options like motion detection, and benefit from night vision with infrared LEDs for 24/7 surveillance.
Remote Monitoring with Mobile Devices
One of the most valuable features of your Night Owl 8-Channel DVR is the ability to maintain constant surveillance over your property remotely using mobile devices. To enable this capability, you must first ensure your wired DVR has been successfully added to your Night Owl Protect account. This crucial integration establishes a secure connection between your security system and your mobile device. Once linked, logging into the Night Owl Protect application on your smartphone or tablet grants you immediate access to live camera feeds and recorded footage from anywhere with a stable internet connection. This empowers you to remotely monitor your home or business with flexibility, providing unparalleled peace of mind. The Night Owl system seamlessly fits your mobile lifestyle, making security management convenient and immediate. For detailed instructions on creating your account and adding your device, please refer to page 33 of this user manual. This guidance ensures a smooth setup process, allowing you to quickly enjoy all mobile surveillance benefits, staying connected to your security system at all times, receiving alerts and viewing real-time activity directly on your handheld device.
Recording Options and Motion Detection
Your Night Owl 8-Channel DVR offers robust recording capabilities designed to secure your property effectively. Among these, the system supports various recording options to suit your specific needs. You can configure continuous recording for uninterrupted surveillance, ensuring every moment is captured. Additionally, scheduled recording allows you to set specific times for the DVR to activate, optimizing storage usage. A crucial feature is motion detection, which triggers recording only when activity is detected within the camera’s field of view. This intelligent function not only conserves hard drive space but also makes reviewing footage more efficient by highlighting significant events. When motion is detected, the DVR can automatically begin recording, and depending on your settings, it can also send alerts to your mobile device, keeping you informed in real-time. The system also supports loop-cycle recording, where older footage is overwritten by new recordings once the hard drive is full, ensuring continuous operation without manual intervention. This combination of flexible recording options and advanced motion detection provides a comprehensive and efficient surveillance solution for your home or business, enhancing your overall security posture.
Night Vision with Infrared LEDs
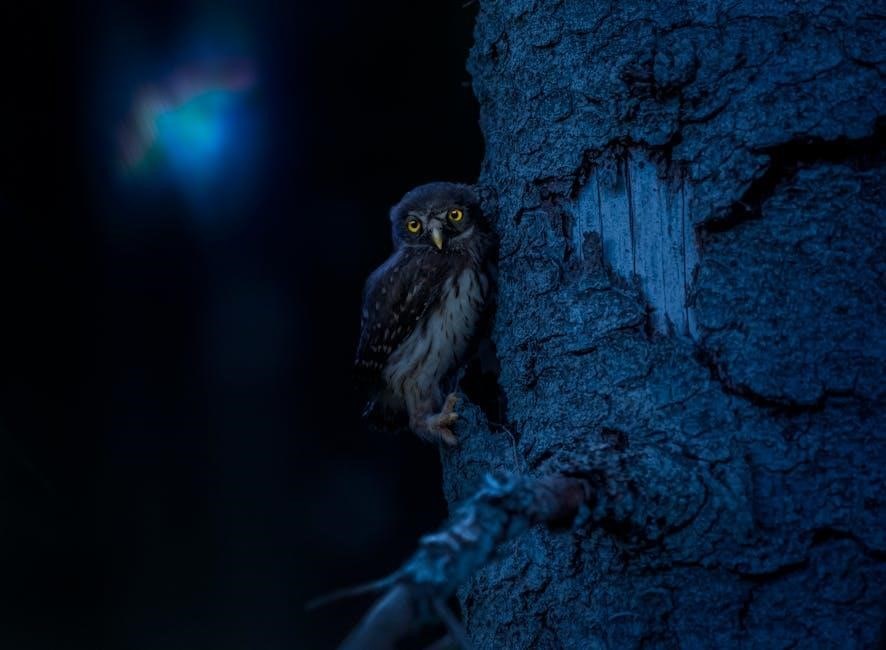
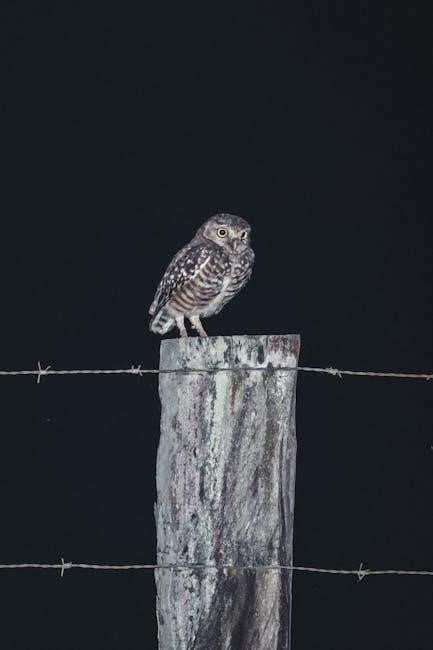
Night vision is a critical feature for any robust security system, and your Night Owl 8-Channel DVR is enhanced with advanced infrared (IR) LED technology to ensure comprehensive surveillance around the clock. The cameras integrated with your DVR system are equipped with these powerful infrared LEDs, which emit light in the infrared spectrum, invisible to the human eye. This allows the cameras to capture clear, detailed black-and-white images and video footage even in very low-light conditions or complete darkness. With this essential infrared capability, your security system operates effectively 24 hours a day, providing continuous protection for your property. The specific number of IR LEDs, such as “Infrared 8 LEDs” found in certain models, directly influences the range and clarity of the night vision, illuminating larger areas for extended visibility. This ensures that no potential threats or activities go unnoticed due to insufficient ambient light. The transition between day and night vision modes is typically automatic, triggered by changes in ambient light levels, offering seamless operation. This robust night vision functionality is indispensable for monitoring outdoor areas, dimly lit interiors, or any space where traditional lighting is inadequate, significantly enhancing the overall security coverage of your Night Owl DVR system.
Maintenance, Firmware, and Troubleshooting
For optimal performance, regular maintenance is crucial. This section guides you through checking your DVR’s current firmware version and provides update instructions. Learn how to troubleshoot common issues, including locating the hard reset button on your Night Owl 8-channel DVR for quick resolutions and sustained security.
Current Firmware Version Check
To ensure your Night Owl 8-Channel DVR operates with optimal performance and the latest security enhancements, regularly checking its current firmware version is a critical maintenance step. Firmware updates often introduce new features, improve system stability, and patch potential vulnerabilities, safeguarding your surveillance system against evolving threats. Identifying your DVR’s current firmware is typically a straightforward process accessible through the device’s main menu or settings interface.
First, power on your Night Owl DVR and log in using your administrator credentials. Navigate to the system settings, which might be labeled “System Information,” “About,” “Maintenance,” or “Advanced Settings,” depending on your specific model. Within this section, you will usually find a dedicated entry displaying the “Firmware Version” or “Software Version.” For example, models like the DVR-FTD8-8 might show a version such as 1.2.8, while a DVR-FTD8-16 could display 1.3.5. Make a note of this version number. Comparing this number to the latest available firmware on the Night Owl support website will inform you if an update is necessary. Keeping your firmware up-to-date is a proactive measure that enhances both the functionality and security of your Night Owl 8-channel DVR system. This simple check is fundamental for maintaining a robust and reliable security setup.
Firmware Update Instructions and Download
Updating your Night Owl 8-channel DVR’s firmware is crucial for maintaining optimal performance, security, and accessing new features. To begin, you must first locate and download the correct firmware file for your specific DVR model. Visit the official Night Owl support website, navigate to the “Support” or “Downloads” section, and enter your DVR model number, such as DVR-FTD8-8 or DVR-FTD8-16. Look for a link labeled “Click To Manually Download” next to the latest firmware version.
Once downloaded, the firmware file, typically a .bin or .rom, needs to be transferred to a FAT32-formatted USB flash drive. Ensure the USB drive is empty before copying the file. Insert the USB drive into the DVR’s USB port. Access your DVR’s menu, navigate to “System,” then “Maintenance” or “Upgrade.” Select “Upgrade Firmware” or “System Upgrade” and choose the file from the USB drive. Follow on-screen prompts carefully. It is critical not to power off or restart the DVR during the update, as this could permanently damage the device. After completion, the DVR will restart; verify the new firmware version in system information.
Troubleshooting: Hard Reset Button Location
If your Night Owl 8-channel DVR is experiencing persistent issues, a hard reset can often resolve them by restoring factory default settings. Many users, particularly those with models like the Night Owl 8 Channel H.264 1080P AHD DVR-F6B-81-RS, frequently inquire about the hard reset button’s location. This critical button is typically a tiny, recessed pinhole, designed to prevent unintentional activation. To press it, you will need a small, pointed object such as a straightened paperclip.
Common places to find this button include the back panel of the DVR, often situated near other connection ports like USB, Ethernet, or the power input. Occasionally, it might be located on the bottom of the unit, potentially concealed within ventilation slots or beneath a product label. Carefully inspect your DVR for any small, unmarked apertures. The most reliable source for its exact placement is your specific model’s user manual, which usually includes a detailed diagram. Press and hold the button for about 10-15 seconds while the DVR is powered on, then release and allow it to restart. This simple action should initiate the factory reset process.